Installing a WordPress theme
The process of installing a WordPress theme is easy and simple.
There are several ways to do it: either use WordPress dashboard or FTP client. In this article, we are going to discuss all methods.
Please note, activation of a new theme will change the appearance and functionality of your website.
Use WordPress dashboard
In order to install a WordPress theme, login to your WordPress dashboard:
- Navigate to Appearance → Themes.
- On the opened page, you will see all the themes you have currently installed on your WordPress site.
- To add another theme, simply click on Add New button at the top of the themes screen.
On this page, you'll have two (2) options to add a new theme.
You can either use the search field which will show the themes that are hosted in the WordPress.org theme directory or you can upload your own theme from your computer.
1. Install a theme by using the Upload method
This method is required for premium themes hosted on vendors website.
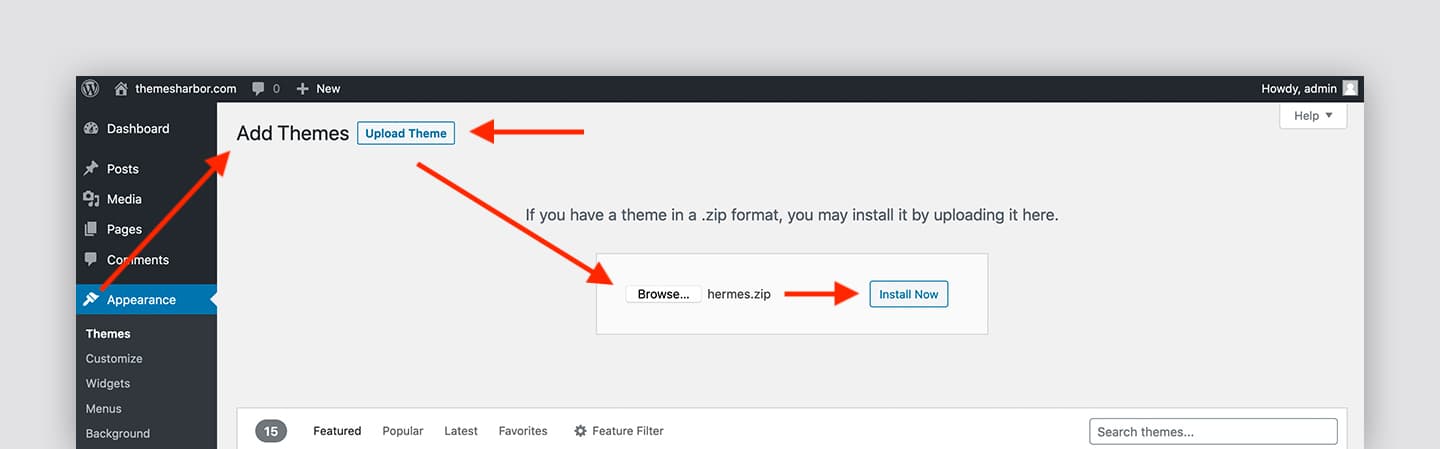
On the Add Themes page:
- Click Upload Theme button at the top of the screen. Before the upload, make sure you have a .zip file of the theme. There several ways to download the theme files you've purchased at Themes Harbor.
- Click the Choose File button, select the .zip file that you downloaded earlier.
- Click the Install Now button.
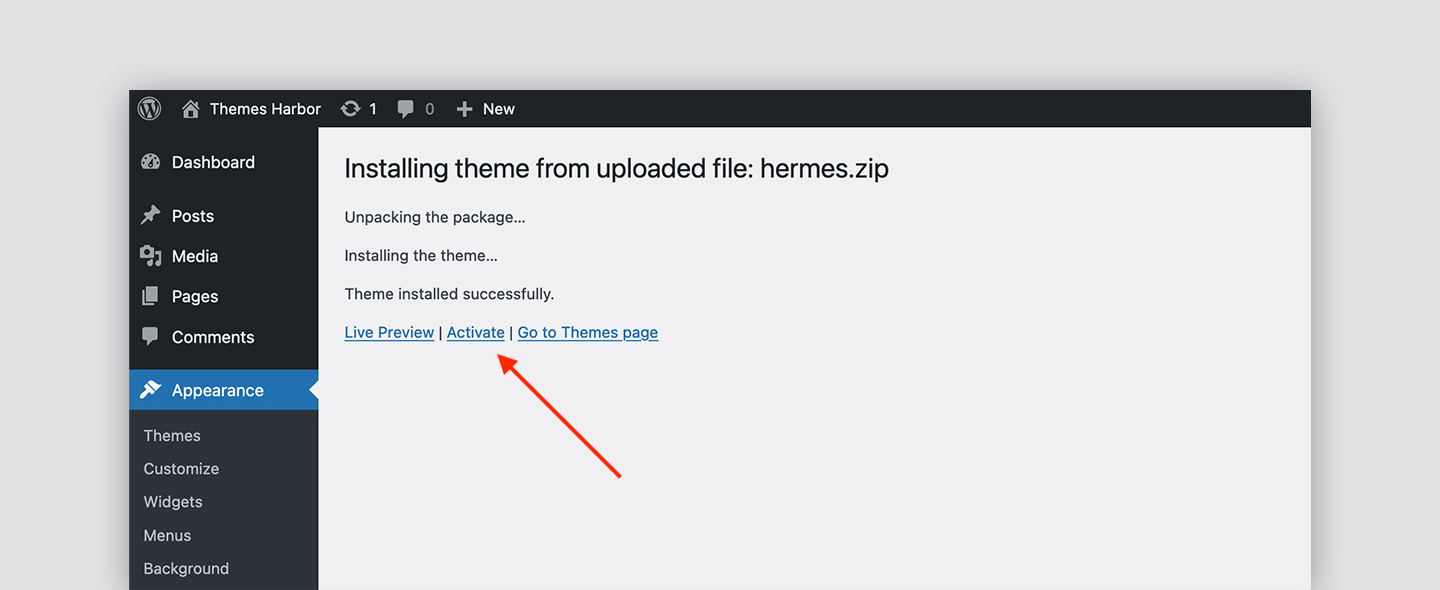
After installing the theme on your WordPress site, you need to activate it:
- Click on the Activate link.
- After activation, you will be automatically redirected to the Themes Info page where you can enter your license key to keep your theme up-to-date.
- Enjoy your new WordPress theme.
You should also see that this theme is listed as your current active theme in WordPress dashboard.
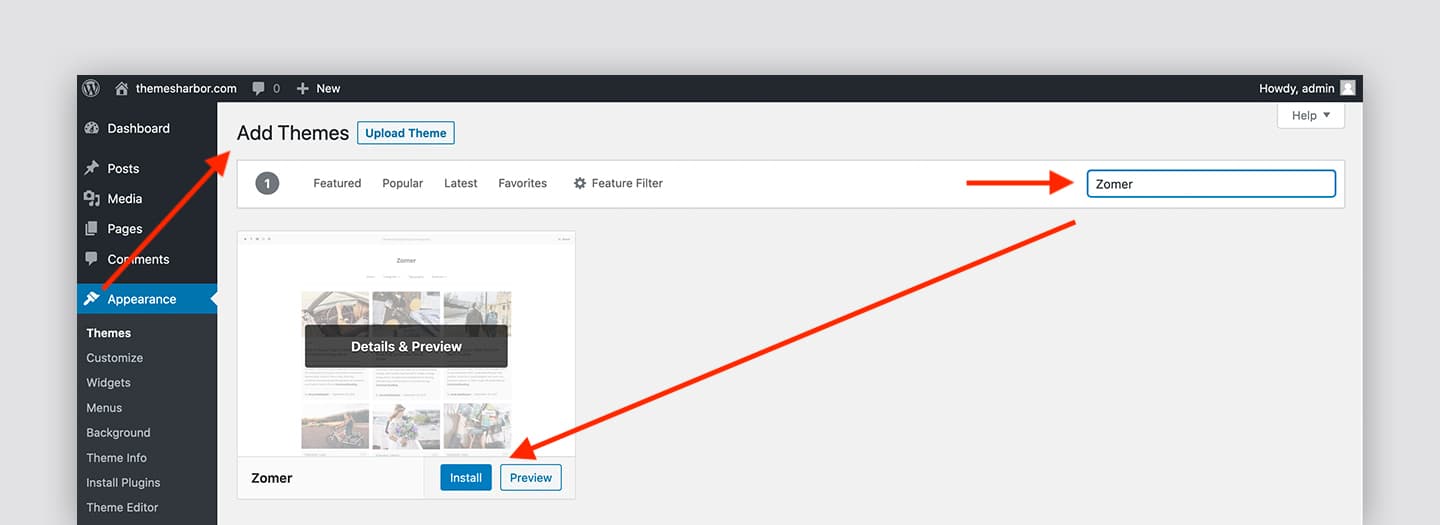
2. Install a theme from the official WordPress theme directory
This method is common for free themes hosted at the WordPress.org theme directory.
On the Add Themes page:
- Use either the Search or Filter options to find a theme you would like to have on your WordPress site.
- Once you choose which theme you want to use for your website, press Install button.
Then your WordPress application will start to download and install the theme that you've chosen. After a successful installation, you will be able to activate the theme for your website.
Use FTP client
This is an alternative method of uploading a theme to WordPress. Note, this method is a little bit more advanced compare to the previous one.
Also, you will need to have FTP credentials in order to upload your theme's files using this method. You can get this information from your hosting provider.
Once you have your FTP credentials:
- Login to your server using a FTP client
- Upload the non-zipped theme folder into the /wp-content/themes/ folder. Remember, you have to unzip your theme's file before you upload them to your server.
- Active the theme in WordPress dashboard. To activate the theme go to Appearance → Themes and click on the activate button.